Digitization of video cassettes at home: programs, devices, without a tuner
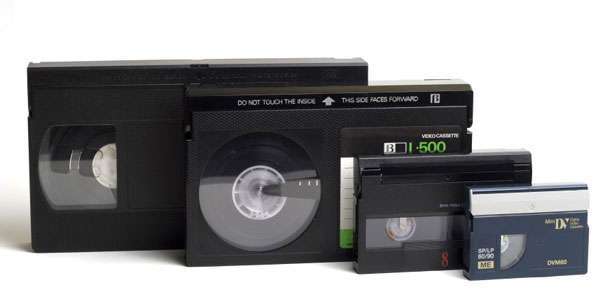
Many families keep video cassettes with memorable shootings in their archives. However, over time, the quality of the recordings deteriorates as the videotape inevitably demagnetizes. How to save information longer – for this it should be rewritten from a cassette to a disk.
Digitizing video cassettes in salons is a very expensive pleasure, and why overpay for something that can be done at home, that is, transferring filming from the analog format used in video cassettes to digital form and then storing it on any type of media that supports digital format. And if you figured it out
Digitization of video cassettes at home with the program "AverTV6"
There is another option for digitizing recordings from video cassettes, for which you will need:
- video recorder;
- TV tuner "AverTVSuper 009" from Avermedia (pay attention to the minimum requirements for a computer system so that it can handle video recording);
- computer or laptop with an external TV tuner;
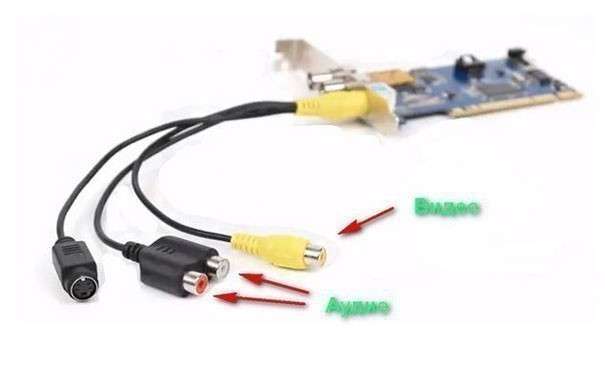
- two adapter cables for an external TV tuner with USB connectors and "tulips" and one cable for an internal one (with "tulips"). Usually TV tuners themselves are equipped with such cables, although not always.
That’s all you need to successfully digitize videotapes at home. If the TV tuner is built-in, then it is connected to the system unit via a PCI connector, and an external one via a USB port. The VCR is connected to a TV tuner, and the latter, if it is external, must also be connected via USB to a computer and powered through the network. Drivers and a program called "AverTV 6" are installed from the disk attached to the TV tuner.
Next, the program starts and a simple recording procedure begins.
- The control panel is displayed on the screen.
- The cassette must be inserted into the VCR and turned on for playback.
- At first, a usually fuzzy picture appears. Its clarity must be adjusted manually by clicking on the image with the right mouse button and selecting the line “Channel settings" from the menu that appears.
- In the window that opens, you should change the video formats in turn until the most suitable one is found, in which the clarity of the picture will automatically change. There are only seven such formats.
- In the same menu there are sections for adjusting color and sound, where you can adjust the volume, contrast, brightness, etc.
- After determining the appropriate format, you can start recording.
- The cassette must be rewound to the episode from which recording should begin, after which it is simultaneously played back and recorded to a computer file.
- The red indicator circle signals the recording process.
The program also provides a function to automatically turn off the recording (after half an hour, an hour, one and a half or two hours). When the recording is completed, its process is stopped by pressing the square icon. The resulting video can now be transferred from a computer to any suitable medium.
Keep in mind that initially digitized video takes up a huge amount of space on your hard drive (every hour – 10-14 GB). Therefore, you need to compress the video without quality loss before storage, that is, convert it to an acceptable size. The conversion can be done with MediaEncoder or CanopusProCoder. And then burn the movie to a DVD disc or a flash card.
How to digitize a video cassette with BeholdTV
To take advantage of the program for digitizing video cassettes at home, you will need the following items: a computer with a Behold TV tuner installed, a VCR, a three-wire tulip-tulip connecting cable, the Videomaster program, and if you need to cut and join videos – more and the Avidemux program.
Transferring information from a videotape to a computer hard drive
Before you digitize a videotape, you need to do the following:
- The video tuner of the computer is connected by a tulip-tulip cable to the VCR.
- The yellow connector of the connecting cable, which transmits the video signal, is connected to the “videoout” jack of the VCR, and the two remaining “tulips” (white and red), intended for sound recording, are inserted into the sockets of the corresponding colors “audioout”.
- The same "tulips" from the opposite end of the cable are inserted into the corresponding connectors on the tuner (the tuner kit includes a special cable for digitizing video cassettes).
Next, the program for digitizing videocassettes "BeholdTV" opens and the following parameters are set in its settings:
In the "Video / Audio Recording Settings" menu, select:
- video frame size 384×288;
- video recording option "Microsoftavi";
- frequency, frame / s – 1 to 1;
- YUY2 format;
- video stream compression – no;
- audio stream format/compression 16 bit, 32000 kHz, StereoPCM;
- alternation mode – no;
- main stream – audio;
- check the boxes for writing to a file and high priority;
- specify the path to save the generated files.
In the Audio Recording Settings menu:
- Microsoft ACM video recording option;
- audio format/compression 16 bit, 44100 kHz, StereoPCM;
- tick off "Record audio stream via PCI bus", "Don’t create WAV container for MP3", "Write to file";
- set the path to save the files.
After the settings are set, the video recorder and the device for digitizing video cassettes at home are switched on for playback (the “video recording” icon on the “BeholdTV” panel). Since failures can occur during recording, it is desirable to control its process using the recording panel of this program. If the digitization of videocassettes at home has failed, then the videocassette tape must be rewound back to the point of failure and the recording process should be resumed until all the information has been transferred to the hard disk.
Merging files and converting videos
The resulting video file must then be converted. This is necessary because when digitizing a standard three-hour video cassette with the recording parameters we specified, the final file turns out to be gigantic (60 or more gigabytes). The procedures for connecting several videos and converting the resulting file into a reasonable format are performed by the same VideoMaster program. This program is launched, and the following presets are made in it:
- AVI file format;
- DivX (384×288) video codec;
- good quality;
- frame size – original;
- frame rate – original;
- audio codec MP2, bitrate 256, frequency 44100;
- bitrate auto.
Click the Add icon, then go to the Add Video menu. Then, in the usual way, go to the desired files, mark and open them. Next, you need to specify the folder in which the final file should be saved, and then click on the "Connect" icon. Further, the program combines separate files into one, then converts this file into DivX format. After the conversion process, the final video file will take approximately 2 GB.
Video editing
It is useful not only to know how to digitize a video cassette at home, but also how to remove some fragments from the recording. To do this, you need to use the Avidemux program, for which you need:
- After opening the program, go to the "File" section and click "Open". In the window that opens, the desired file is searched for and marked.
- Focusing on the demo window, find the beginning of the fragment to be deleted, then open the "Edit" section and select the "Set Marker A" option.
- Move the checkbox to the end of the cut fragment, and through the "Edit" option, set the marker B.
- Return to the "Edit" option and click on the "Cut" option.
- Enter the “File” menu again and, by clicking “Save” and “Save video”, determine the location for storing the video file, giving it a name in the corresponding window.
- Press "Enter" a couple of times, agree with the prompts that appear, after which the digitization will be completed.
Home digitization of video cassettes without a tuner
It is also possible to digitize video cassettes at home without a tuner, using a digital video recorder. This is the best and simplest option for those who do not want to deal with complex computer technology.
Using a digital video recorder, you can easily copy information from a video cassette. The output of a conventional VCR is connected to the digital input, a DVD is inserted into the latter and copying begins. The resulting record can then be transferred to a computer for further processing. But this method has a significant limitation in quality, so not everyone likes it.


