We all know well what ice is – it is frozen water, which has three main phase states: gaseous (steam), liquid (water) and solid (ice). People use ordinary transparent ice to cool a cocktail, apply it to a bruised place, after all, for winter skiing and in a number of other cases, fruit ice is eaten like ice cream. Regular ice is very easy to make in the fridge.
But there is also the so-called dry ice, which, when evaporated, forms a thick fog around itself. It is easy to purchase dry ice, but many people will be very interested in the topic of how to make dry ice at home. It turns out that this is possible.
What is dry ice?

Before you make dry ice at home, you need to figure out what it is. Dry ice is made up of solid carbon dioxide. Due to this, this substance is odorless and completely non-toxic. Being a product of combustion, it can only extinguish the flame. Dry ice at atmospheric pressure cannot form a liquid phase, therefore, when heated, it immediately passes into the gaseous phase. The sublimation temperature of solid carbon dioxide is -78.5 degrees. Dry ice is in some cases used to cool liquids to low temperatures, there are many options for its industrial application, but more often we are used to seeing it in ice cream trays. Dry ice is produced on an industrial scale, and in order for it to last longer, it must be stored in isothermal containers.
If you can’t buy ready-made dry ice, then you can try to make it at home, but be sure to take all precautions.
Getting Dry Ice from Compressed Carbon Dioxide
For the whole technology, you will need a carbon dioxide fire extinguisher and an old pillowcase, which you don’t mind sacrificing. This should be done not indoors, but in an open space, away from children and pets.
Many household fire extinguishers contain sodium or potassium bicarbonate, but there is absolutely no carbon dioxide, without which dry ice cannot be obtained. You can distinguish a carbon dioxide fire extinguisher by marking on the label or by a funnel-shaped socket for spraying a flame-retardant agent, in addition, it does not have a pressure gauge indicating pressure. A carbon dioxide fire extinguisher can be purchased at a specialty store or online.
Care must be taken to protect eyes and hands. The very low temperature of dry ice on contact with the skin can almost instantly cause severe thermal burns (in this case, frostbite). Although there are no special protective suits for the direct use of fire extinguishers, all precautions must be taken in this case to avoid contact with dry ice. Therefore, before starting the experiment, you need to wear the following:
- protective laboratory goggles;
- thick fabric gloves (you can use wool, but it is completely useless to use thin rubber gloves);
- clothing should completely cover the body and limbs;
- It is advisable to wear a lab coat over the clothing.

Procedure
- Insert the socket into the pillowcase, gather around it and firmly fix the pillowcase fabric behind the nozzle so that there are no gaps for the gas to escape. The pillowcase can be wrapped with tape for reliability. Although the pressure will be small, it will not be harmful to play it safe.
- When everything is ready, you need to press the lever and let the gas fill the pillowcase for two to three seconds. Ice will fall to the bottom, although this will not be visible through the fabric. Then you need to release the fire extinguisher lever. Carbon dioxide will begin to seep through the pillowcase. It’s not too dangerous, but unless it happens in a small space, that’s why it’s worth doing it outdoors. If the lever does not give in, you need to make sure that the safety pin has been removed before starting work.
- Then the fasteners of the pillowcase should be unwound and the bell should be released from it. When sliding the pillowcase along the socket, it should be pressed firmly against it to remove frozen ice. At the bottom of the pillowcase will be a loose pile of dry ice, resembling foam balls.
- The bag must be held vertically. You should not make more ice than required, its excess will simply disappear.
- You can safely touch dry ice in thick protective fabric gloves. But if they are too thick, they will quickly give you a feel for how cold the dry ice is.
- Next, the resulting ice must be transferred from the pillowcase to a more suitable storage, it is best if it is a container made of frost-resistant plastic, and even better a thermos. The larger and more solid a piece of dry ice, the slower it will evaporate.
- The thermos or container must not be hermetically sealed. After all, ice will inevitably sublime, forming carbon dioxide, which will simply tear off a tight lid or explode a container. The lid can only cover the container slightly.
How to store dry ice?
It is important to know not only how to make dry ice at home, but also to be able to save it. Not all materials are suitable for storing dry ice.
- Do not use glass, porcelain or ceramic utensils (unless they are heat-resistant), which can crack from the cold.
- Fancy metal containers can also warp and break when in contact with ice.
- It is much more reliable to store dry ice in plastic containers designed for making ordinary ice in the freezer.
- It is best to store dry ice in a loosely covered metal thermos.
Video how to make dry ice
Dry ice from carbon dioxide bottles
Of course, not everyone has a carbon dioxide fire extinguisher. But instead, you can use a canister filled with carbon dioxide – these are sold in hardware stores. But before buying such a cylinder, you need to make sure that it has a nozzle in the form of a dip tube, which can be purchased separately. From a cylinder with a dip tube, gas comes from its bottom, which makes it possible to generate dry ice. If the cylinder is without a tube, then gas is supplied from its upper part and such a cylinder is not suitable. Cylinders with dip tubes are marked with two white stripes, while those without are simply black. If you have to produce dry ice often, then it is better to buy a special device – a nozzle with a fabric bag, which is easy to fasten and unfasten from the cylinder.
The process describing how to make dry ice is exactly the same. The nozzle is attached to the container and wrapped in a pillowcase, after which gas is released for several seconds, and the resulting ice falls to the bottom of the pillowcase. The security measures are the same as described above.
Tricks with dry ice
If you manage to get dry ice at home, then you can surprise the household with curious tricks with it.
Balloon inflation without pump and lips
You can make such a riddle for children, and then put a few pieces of dry ice in an empty rubber ball and tie it tightly. In just a few minutes, the balloon will inflate by itself, delighting the astonished children. The main thing is not to overdo it with dry ice, otherwise the balloon will swell so much that it may burst.
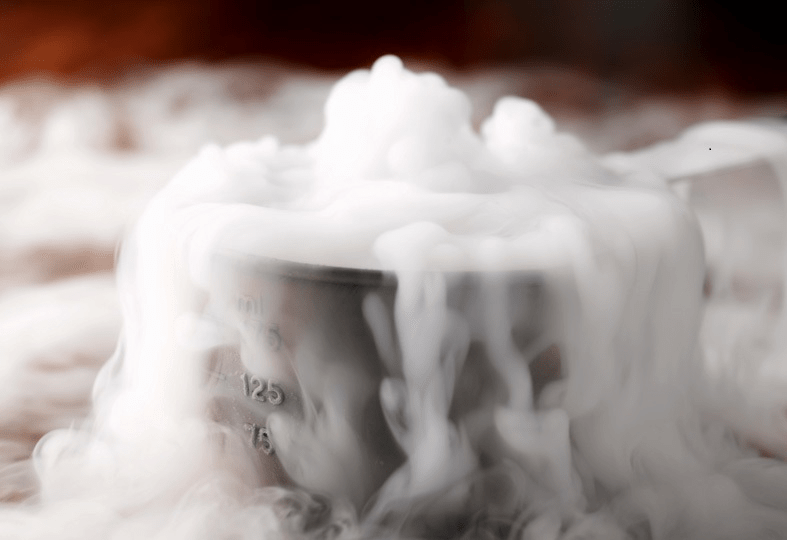
Smoke generator
To create stage fog or smoke, which is often used during performances, all you need is a bowl of water and a portion of dry ice. Ice must be thrown into the water, from which cold heavy water vapor will begin to actively stand out, which, unlike the real one, will not rise up, but will flow down like a liquid to the lowest place. Moreover, the warmer the water is used, the more actively the “mystical" smoke is generated in it.
giant soap bubble

In childhood, all people loved to blow soap bubbles. Moreover, the largest bubbles, shimmering with all the colors of the rainbow, called for special delight. But you can make a very large bubble, the size, for example, of a basin. So, you need to pour warm water into a pan or basin and throw dry ice into it. Then take a ribbon or rope, the length of which is greater than the diameter of the selected dish, moisten it in detergent or liquid soap and draw from the edge of the dish to the edge, pressing it tightly against them. Then you can admire the growing giant soap bubble. The gas released from dry ice will inflate the bubble more and more until it bursts.